

Master Epoxy Floor Maintenance: The Definitive Guide to Long-Lasting Shine and Durability
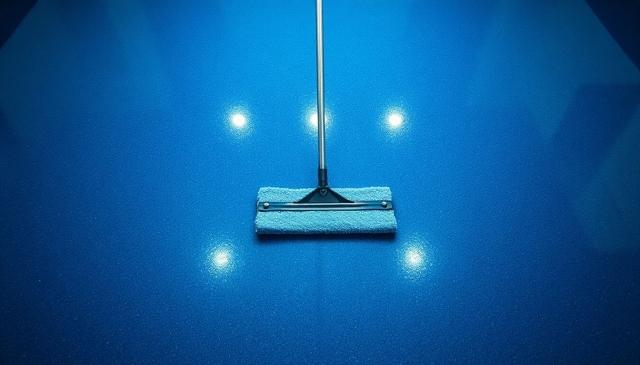
Epoxy floors turn any space into a sleek, tough surface that resists stains and wear. You invest in this durable flooring solution for its shine and strength, but keeping that fresh look takes effort. With the right epoxy floor maintenance steps, you can enjoy long-lasting shine for years without the hassle of constant repairs.
Section 1: Understanding Your Epoxy Floor: Essential Preliminaries
Before you grab a mop or cleaner, learn about your floor. Epoxy comes in different types, each with unique needs. Knowing these details helps you avoid damage during cleaning.
Identifying Your Epoxy Coating Type
Epoxy coatings vary by topcoat. Polyurethane offers a hard, clear finish that handles light UV exposure. Polyaspartic cures fast and resists yellowing in sunny spots. Metallic epoxy adds color and sparkle but needs gentler care to keep the gloss. Check your installation docs or test a small area to see how it reacts to water. This step ensures your maintenance routine fits the exact type.
Tailor your approach based on hardness. Tougher coats like polyaspartic need less frequent deep cleans. Softer ones might show scratches sooner. Always pick products made for epoxy to protect the bond.
The Do's and Don'ts of Initial Curing Period
New epoxy needs time to set. Wait 7 to 14 days for full cure before heavy use or cleaning. Foot traffic too soon can trap dirt and cause marks. Keep the area dry and dust-free during this time.
Avoid common errors like parking cars early or using cleaners before 72 hours. Water spots form if you mop too soon. Heat speeds curing but check maker guidelines to avoid cracks. Patience here pays off in a stronger floor.
Do light sweeping after 24 hours if needed. Place mats to block debris. This simple care sets up your epoxy for success.
Recognizing Signs of Wear and Tear
Watch for fading where sun hits hard. Haze builds from leftover cleaners or poor drying. Minor scratches appear in busy paths from grit or shoes.
Deep gouges mean pro repairs, not just a wipe. Yellowing signals UV damage on older coats. Spot these early to act fast. Regular checks keep issues small and fixable.
Catch problems before they spread. A quick visual once a month spots trouble. This proactive step extends your floor's life.
Section 2: Daily and Weekly Cleaning Protocols for Maximum Luster
Routine care keeps your epoxy shining bright. Start with simple methods to prevent buildup. These habits build a strong defense against dirt.
Dry Cleaning Techniques: Sweeping and Dust Mopping
Grit causes the most harm by scratching the surface. Use a soft-bristle broom or microfiber dust mop daily. In garages or shops, do this every morning to clear sand and dust.
Push gently to avoid streaks. Empty the dustpan outside. This quick task stops micro-scratches before they dull the shine.
For high-traffic spots, mop dust twice a week. It takes just minutes but saves hours later. Your floor stays smooth and glossy.
Choosing the Right Mop and Water Temperature
Pick a flat mop with microfiber pads for even coverage. String mops leave puddles that dry into spots. Rinse the pad often during use.
Use lukewarm water, around 80 degrees Fahrenheit. Hot water can warp the epoxy or react with cleaners. Cold water slows drying and invites streaks.
Test water on a corner first. Adjust as needed for your space. This choice keeps cleaning safe and effective.
Selecting pH-Neutral Cleaning Agents
Harsh chemicals eat away at the epoxy seal. Stick to pH-neutral options between 7 and 8. Ammonia or bleach strips the top layer over time.
Look for degreasers made for garage floors. Brands like Zep or Simple Green work well when diluted. Mix per label to avoid residue.
Why neutral? It cleans without harming the bond. Apply with a spray bottle, then mop up. This method preserves the long-lasting shine you love.
Section 3: Deep Cleaning and Stain Removal Techniques
Tough spots demand more than a quick sweep. Handle them right to restore the surface. Follow these steps for common messes.
Tackling Grease, Oil, and Automotive Fluids
Spills happen in garages fast. Blot with paper towels right away to soak up liquid. Press don't rub to lift without spreading.
Sprinkle cat litter or absorbent powder for big puddles. Let it sit 15 minutes, then sweep. Follow with a pH-neutral degreaser on a cloth.
Wipe and rinse with clean water. Dry fully to prevent rings. Quick action keeps stains from setting in.
- Step 1: Absorb the spill.
- Step 2: Apply degreaser.
- Step 3: Rinse and dry.
This routine works for oil from tools too.
Removing Scuff Marks and Rubber Marks
Shoe scuffs or tire tracks mar the gloss. Use a white non-abrasive pad with mild soap. Scrub lightly in circles.
For small marks, rub with a clean tennis ball. The fuzz lifts residue without scratching. It sounds odd but proves effective.
Avoid brown pads; they grind in dirt. Test on an edge first. Buff dry with a soft cloth for shine.
Dealing with Chemical Spills and Etching Risks
Acids like battery fluid etch the surface quick. Neutralize with baking soda paste right away. Cover the spot and let it fizz.
Wipe off and rinse well. For etching, pros often polish it out. Don't use home kits on deep damage.
Wear gloves and ventilate the area. Act in minutes to save the floor. This care avoids costly fixes.
Section 4: Protecting the Finish: Long-Term Preservation Strategies
Cleaning alone won't cut it. Add barriers to shield your investment. These tips build lasting protection.
Controlling Foot Traffic and Entryway Protection
Dirt tracks in from shoes and wheels. Place large mats at doors to trap grit. Choose rubber-backed ones that won't slip.
In commercial spots, use boot covers for workers. Vacuum mats weekly. This cuts down on abrasive particles by 80 percent.
Encourage habits like removing shoes. It seems basic but works wonders. Your epoxy stays cleaner longer.
Avoiding Harsh Abrasives and Heavy Equipment
Steel wool or rough brushes scratch deep. Swap for soft tools every time. Snow shovels with metal edges gouge too.
For moving items, use dollies with rubber wheels. In shops, opt for carts with felt pads. This prevents drag marks.
Store tools off the floor. Hang them on walls. Small changes yield big results in durability.
The Role of Protective Coatings (Waxes/Sealers)
Add wax every six months for extra guard. Pick acrylic types safe for epoxy. Buff it in with a clean mop.
Sealers add UV block to fight fading. Apply thin layers once a year. Check compatibility with your coat type.
These steps renew the shine. They act like sunscreen for your floor. Enjoy the gloss without worry.
Section 5: Troubleshooting Common Epoxy Floor Issues
Issues pop up despite care. Know how to fix minor ones at home. This keeps your space looking sharp.
Restoring Dullness and Removing Haze
Haze comes from soap buildup or wet drying. Rinse with distilled water to clear it. Wipe with a squeegee right after.
For dull spots, buff with a microfiber cloth. Add a drop of conditioner if needed. Avoid over-wetting next time.
Test in a low-traffic area. Shine returns fast with patience. Regular rinses prevent this.
Addressing Minor Surface Scratches
Light scratches polish out easy. Use a liquid compound for epoxy. Apply with a soft pad and rub gently.
Deeper ones need filler from pros. Don't sand yourself; it thins the coat. Spot treat and buff to blend.
Prevent with mats and dry mops. Early fixes save the finish. Your floor looks new again.
Conclusion: Securing Your Epoxy Floor's Future
Consistent care beats deep cleans every time. Stick to these steps for a floor that shines year after year. Epoxy floor maintenance is simple when you make it routine.
Key rules never change: Use pH-neutral cleaners always. Dry sweep or mop dirt daily. Respond to spills in seconds.
Follow this guide, and your durable flooring solution lasts decades. Grab your tools and start today—your glossy space awaits.